Public transit is an affordable and efficient way to explore cities. A $2–$3 fare can save you significantly compared to rideshares or taxis, and tools like Google Maps make navigating transit systems straightforward. Plus, public transit offers a glimpse into local life, connecting you to neighborhoods beyond tourist hotspots. Here’s a quick guide to make the most of it:
- Research transit options: Check routes, fares, and schedules before arriving.
- Download apps: Tools like Google Maps or Citymapper simplify navigation.
- Choose the right pass: Day or weekly passes can save money on frequent rides.
- Learn schedules: Avoid delays by understanding peak hours and last departures.
- Stay secure: Keep belongings close and avoid displaying valuables.
- Follow etiquette: Offer priority seats and avoid blocking aisles.
- Check accessibility: Research wheelchair-friendly routes or paratransit services.
- Combine transit with walking or biking: Explore areas not directly on transit lines.
- Use transit to/from airports: Save up to 90% compared to taxis.
- Have a backup plan: Prepare alternative routes for unexpected delays.
Public transit can cut costs and enhance your travel experience when paired with proper planning. Combine these tips with discounted flights for a budget-friendly trip.

1. Research Transit Options Before You Arrive
Showing up in a new city without understanding its transit system can lead to wasted time and unnecessary stress. Before you arrive, take some time to familiarize yourself with the local transportation options. For example, major U.S. cities like New York have an extensive subway and bus system run by the MTA, Chicago relies on its iconic L trains and CTA buses, and San Francisco offers cable cars alongside the BART system for regional travel. Depending on the city, you might also encounter light rail, commuter trains, streetcars, ferries, or even monorails. A little research now can save you from scrambling later.
Start by visiting the city’s transit authority website. Search for terms like “[city name] transit map” or “[city name] bus pass information” to find route maps, schedules, and fare details. Apps like Google Maps and CityMapper are also incredibly useful for real-time updates and route planning. Many cities have their own transit apps, such as the MTA app for New York or Chicago’s Ventra app, which often include live tracking and mobile ticketing features.
It’s a good idea to take note of costs and payment methods. For example, single bus fares typically range from $2 to $3, but if you plan to use public transit frequently, weekly or monthly passes can save you money. Also, check whether you’ll need exact change, a specific transit card like MetroCard or OMNY in New York, or if contactless payment options are available.
Don’t forget to review schedules and operating hours. Transit systems often have different schedules for weekdays, weekends, and holidays. Buses and trains generally run on fixed routes with specific numbers, so make sure you know the route numbers and directions you’ll need. Use online tools to map your trip in advance, identify any necessary transfers, and anticipate potential delays. With this prep work, you’ll be navigating like a seasoned local from the moment you step off the plane.
2. Download Transit and Mapping Apps
Once you’ve explored your transit options, it’s time to grab the right apps to make your journey hassle-free. Google Maps is a must-have, offering directions that combine different modes of transportation, real-time arrival updates, and route comparisons for most major U.S. cities. It’s a reliable tool to keep your travel plans on track.
For more specific needs, check out city-based apps from local transit authorities. These often include service alerts, interactive maps, and even mobile ticketing options. If you’re looking to compare routes based on travel time or cost, Citymapper is another excellent choice.
Here’s a quick tip: download these apps before you leave. Enable push notifications for service updates, and make sure to download offline maps so you can access important info even without mobile data. To keep things simple, adjust your app settings to English (United States), display distances in miles, and use the 12-hour clock format.
Features like live arrival times and crowding indicators can make a big difference in timing your trips. Test these tools on a short ride before depending on them for something critical, like getting to the airport on time.
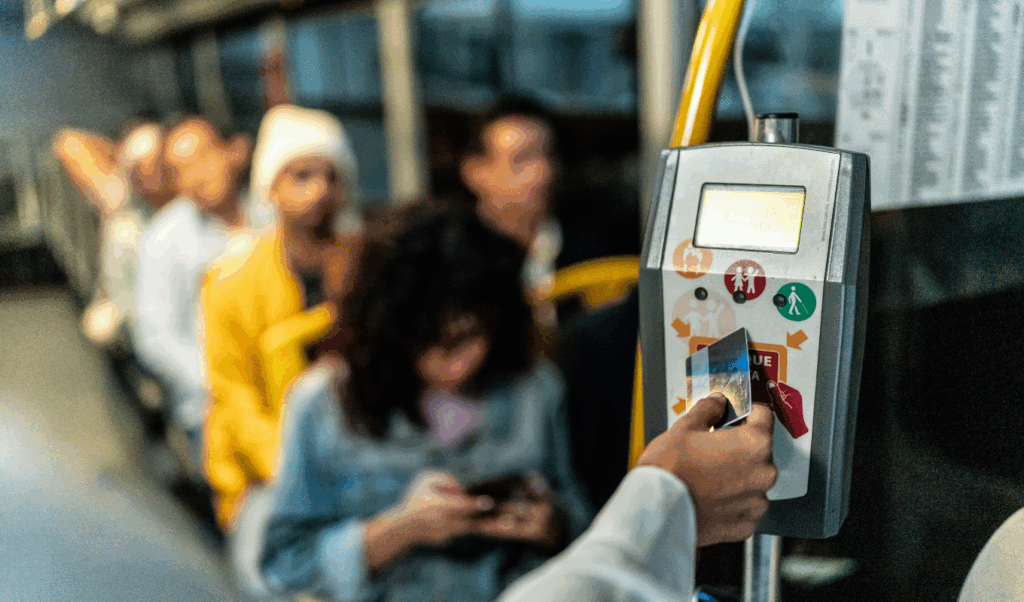
3. Buy the Right Fare Card or Pass
Once you’ve mapped out your route using transit apps, the next step is choosing the best fare option. Picking the right fare card or pass can save you money and make your travel experience smoother.
Start by figuring out which fare product fits your travel plans. Many U.S. transit systems offer options like day passes, weekly passes, or stored-value smart cards, which often cost less per ride compared to paying cash every time. The key is to match the pass to how often you’ll be using transit.
For example, calculate your daily rides and multiply that by the single fare. Then, compare the total to the cost of a day pass. If a subway ride costs $2.75 and a day pass is $7, you’ll save money after three or more trips in one day. Similarly, if you’re staying longer, a weekly or visitor pass might be the better deal.
Smart cards and mobile tickets are another great option. They often come with perks like reduced fares and easier transfers. Some transit systems even offer fare capping, meaning you won’t be charged beyond a daily or weekly limit, giving you unlimited rides without needing to buy a pass upfront. Check the transit agency’s official app for these features – you can usually load passes digitally and avoid waiting in line at ticket machines.
If you’re eligible for reduced fares (children, seniors, students, or riders with disabilities), be sure to bring the necessary ID. Tourists should also look into special visitor passes. These often bundle unlimited rides for one to seven days and are conveniently sold at airport stations. Just keep an eye out for zone surcharges on airport trips – some routes may require an extra fee even if you have a pass.
One tip: Passes tied to calendar days can lose value if you buy them late in the day. If you’re unsure about your plans, consider starting with a shorter-duration pass. You can always upgrade or reload later as your schedule becomes clearer. And if you’ve managed to save on airfare through services like Dollar Flight Club, those savings might be better spent on a weekly pass to keep your local transit costs predictable.
4. Learn Schedules and Peak Travel Times
Planning around transit schedules not only saves money but also makes your travel smoother. By understanding when buses and trains operate – and their busiest times – you can avoid unnecessary delays and frustration. Transit schedules often change depending on the day of the week. For example, service is usually reduced at night, on Sundays, or during holidays. Without checking ahead, you could find yourself waiting much longer than anticipated, especially for routes that run more frequently during peak hours.
Start by visiting your local transit agency’s website or app to access route maps, timetables, and important service notes. Pay attention to labels like “limited”, “peak only”, or “no Sunday service.” On your first day, make sure to confirm the last departure times for any evening routes you plan to use, particularly in smaller cities or suburban areas where service may end earlier than expected. It’s also important to understand how peak travel times affect these schedules.
Weekday rush hours – typically from 7:00 to 9:30 a.m. and 4:30 to 7:00 p.m. – can be especially crowded. Boarding may take longer, and the ride itself might be less comfortable. If you’re carrying luggage or new to the transit system, it’s a good idea to plan your trips just before or after these peak times. Shifting your schedule by even 30 minutes can make a big difference. Plus, some commuter rail systems charge higher fares during rush hours, so traveling outside of these times could save you money, too.
For real-time updates, use apps like Google Maps, Citymapper, or your local transit agency’s app. Even the most reliable schedules can be affected by traffic, construction, or other disruptions. If you’re catching a flight or another time-sensitive connection, build in extra time by planning for an additional transit interval – just in case.
If your flight is scheduled for early morning or late at night, double-check the transit options during those hours. Many systems reduce or stop service overnight. Knowing the first and last departure times ensures you can align your transit plans with your flight or arrange for an alternative if needed.
5. Keep Your Belongings Secure
Theft is a common issue on public transit, with New York City’s subway alone reporting over 2,000 incidents each year. Items like phones and wallets are frequent targets, and thieves often rely on tactics such as bump-and-grab or slash-and-grab to make their move. Being aware of these strategies can help you stay one step ahead.
To keep your belongings safe, use zippered bags and wear them on your front or keep them on your lap. Never leave your bag unattended on seats or the floor. If you’re on a bus, sitting near the driver can add a layer of security, while on subways, opt for well-lit cars with visible cameras.
Avoid showing off valuables like expensive phones, laptops, jewelry, or large amounts of cash. For example, iPhones are involved in about 40% of thefts on NYC’s subway system. If you need to use your phone for navigation, hold it securely and stay mindful of your surroundings. Consider investing in anti-theft bags made with slash-proof materials and lockable zippers, especially if you’re traveling on busy transit systems.
The timing of your ride can also make a difference. Theft risks are higher during rush hours (7:00–9:00 a.m. and 4:00–7:00 p.m.) and late at night after 10:00 p.m., when stations tend to be less monitored. If you’re traveling during these times, stick to busy, well-lit stops even if it means a slightly longer walk. In smaller towns, bus stations that double as post offices or gas stations can become more dangerous after dark, so exercise extra caution.
If you do experience theft, act quickly. Record details like the time, location, and any information about the suspect. Report the incident immediately to transit authorities – many systems, such as New York’s MTA, offer quick reporting options through station booths or mobile apps. File a police report for insurance purposes, and if needed, contact your credit card company or embassy for further assistance.
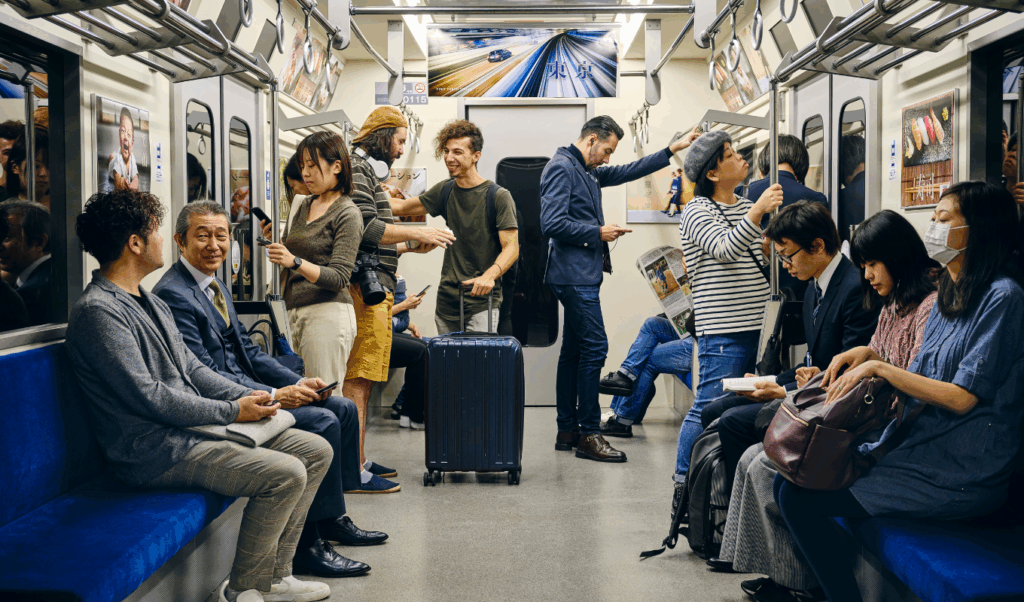
6. Follow Local Transit Etiquette
Understanding and respecting local transit etiquette can make your public travel smoother and more pleasant. One key rule across U.S. transit systems is priority seating. Seats near the front of buses and trains are reserved for older adults, pregnant individuals, people with disabilities, and those traveling with small children. If you’re in one of these seats and see someone who needs it, offer your seat right away – it’s not just polite, it’s the law in many places.
Another important practice is to let riders exit before boarding. Standing aside at bus stops or train platforms and waiting for passengers to step off first helps avoid unnecessary delays and congestion. On escalators, stick to the right if you’re standing, leaving the left side clear for those who want to walk.
When it comes to personal devices, use headphones and keep the volume low. If you’re on a call, keep it short and speak quietly. Many transit agencies explicitly ask riders to follow these guidelines as part of their codes of conduct. And don’t forget to silence your phone – loud ringtones in a packed subway car can be a major annoyance.
Be mindful of your belongings, too. Keep bags on your lap or tucked between your feet to avoid taking up extra seats or blocking aisles, especially during crowded rush hours. And no matter how tempting it might be, never put your feet on seats – it’s both disrespectful and unsanitary.
Lastly, on buses where it’s customary, thank the driver when you exit. This small act of gratitude is widely practiced across U.S. cities and shows appreciation for the hard work of transit operators. Pay attention to how locals behave, and you’ll quickly pick up on the unspoken rules of the road.
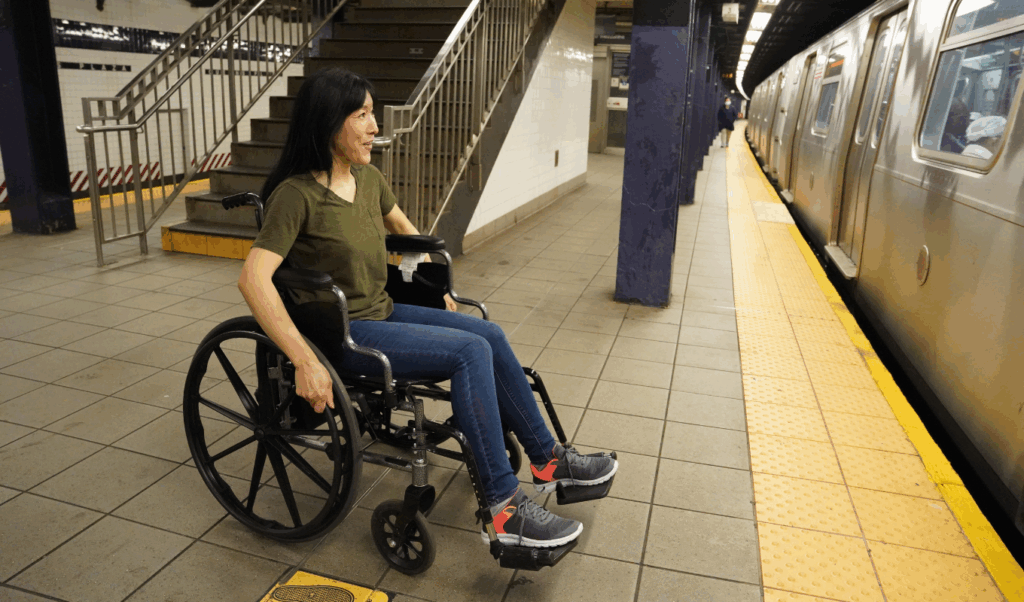
7. Check Accessibility Options
Before setting out on your trip, take some time to research the accessibility features available at your destination. Thanks to the Americans with Disabilities Act (ADA), public transit systems across the U.S. are required to provide accommodations. However, the level of accessibility can differ from one city to another. For instance, as of 2022, more than 1,200 transit agencies offered paratransit services, assisting millions of riders each year.
Accessibility plays a vital role in transit planning, so it’s worth visiting the transit authority’s website for detailed maps and guides. Some cities, like Chicago, have made significant strides – all of the Chicago Transit Authority (CTA) buses are fully accessible. Similarly, San Francisco’s BART and Muni systems boast over 90% accessible stations. On the other hand, New York City’s subway system lags behind, with only about 25% of stations being fully accessible. If you’re traveling in NYC, it’s a good idea to check elevator statuses ahead of time to avoid surprises.
Mapping tools like Google Maps and Apple Maps can be invaluable for planning step-free routes. Many cities also have specialized apps – LA Metro, for example, provides real-time elevator alerts to help riders navigate outages. Additionally, most transit systems offer paratransit services, which provide door-to-door transportation for those unable to use standard buses or trains. If you need this service, be sure to contact the transit agency at least 48 hours in advance.
Look out for features like wheelchair ramps, kneeling buses, tactile paving for the visually impaired, audio announcements, and dedicated spaces for wheelchairs and service animals. To make your journey smoother, consider traveling during off-peak hours when accessibility features are less likely to be impacted by crowding.
8. Combine Transit with Walking and Biking
Public transit doesn’t always have to be a door-to-door solution. By blending buses and trains with walking or biking, you can uncover neighborhoods, parks, and local gems like restaurants that may not be right along a transit line. Plus, it’s a great way to soak in the city’s vibe while sneaking in some light exercise.
Many U.S. cities make this combination simple with apps like Google Maps, Apple Maps, or Citymapper. These tools can create mixed-mode routes for you – just select “Transit” and review the walking or biking directions for the first and last legs of your trip. They even provide walking times, bike routes, and real-time transit departures, so you can decide whether to walk, hop on a bike, or wait for the next bus.
If biking sounds appealing, check out the bike-share systems and e-scooters many cities now offer. These can be docked or dockless, and you can unlock them through an app for short rides between transit stops and your destination. Before renting, make sure to verify details like payment methods, age restrictions, pricing, and parking rules. Prefer using your own bike? Most buses are equipped with front bike racks, and many trains allow bikes onboard – just check the local transit agency’s policies on full-size versus folding bikes and any restrictions during peak hours.
Safety is key when you’re walking or biking in an unfamiliar city. Stick to well-lit, busy streets, keep an eye on traffic and bike lanes, and secure your belongings. If you’re biking, ride with traffic, follow road signals, use hand signals, and wear a helmet if you can. During rush hour, walking or biking a short distance to a less crowded station might even save you time compared to boarding at a busy stop.
For those traveling on a budget, many cities offer day or multi-day transit passes with unlimited rides. Some also have bike-share passes that cover a set number of short trips. Pair these options with discounted flights from Dollar Flight Club to keep your trip affordable – no pricey car rentals needed.
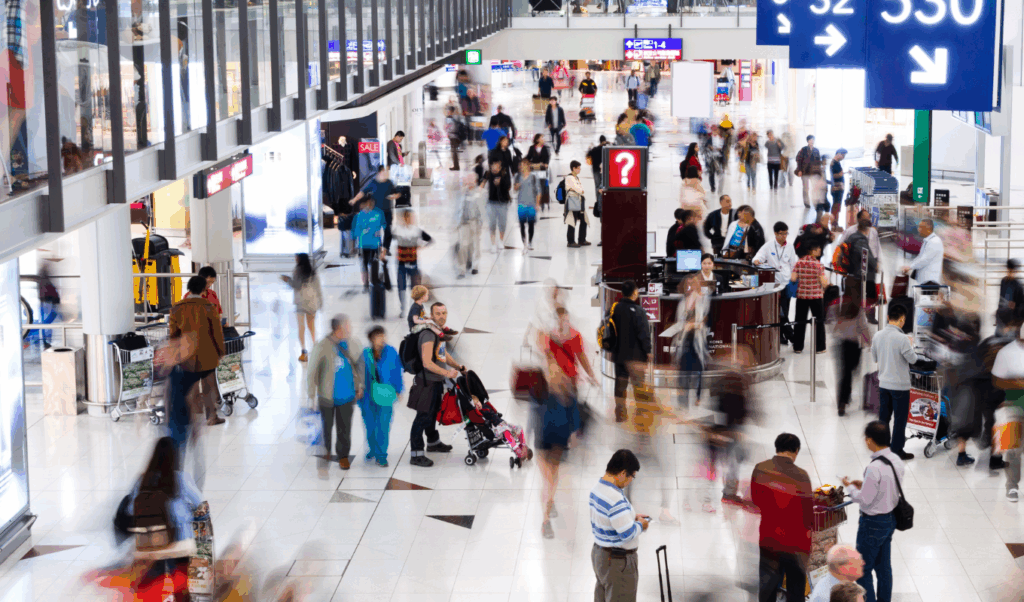
9. Connect to Airports Using Public Transit
If you’re looking to save money on airport transportation, public transit can be a game-changer. Compared to taxis or rideshares, public transit can cut your costs by 70–90%. For instance, instead of shelling out $50 or more for a cab, you can often spend just $5 to $25 on buses, subways, or trains – and you won’t have to worry about surge pricing during busy hours. It’s a budget-friendly way to get to the airport without compromising convenience.
Many major U.S. cities have excellent public transit connections to their airports. In New York, you can take the AirTrain and subway to JFK for a total of $8–$11. Chicago’s CTA Blue Line offers a direct route to O’Hare for just $5. San Francisco’s BART connects to SFO for $10, while Los Angeles travelers can use the FlyAway bus or Metro for $9.75. Washington Dulles is accessible via the Silver Line Metro for $6. Most of these systems accept contactless payment, making it easy to hop on board.
To plan your trip, use apps like Google Maps or Citymapper for real-time schedules and transfer details. For additional information, check the official transit websites – such as New York’s MTA or Chicago’s CTA – for maps and fare options. Keep in mind that transit schedules can vary between weekdays and weekends, especially during holidays.
Timing is key when using public transit. Avoid rush hours (7–9 a.m. and 4–7 p.m. on weekdays) to steer clear of crowded trains and potential delays. Arriving at the station 20–30 minutes early gives you time to buy tickets or load fare cards like NYC’s MetroCard or Chicago’s Ventra. If you’re traveling with large luggage, buses typically offer more space compared to packed subway cars.
For maximum savings, pair affordable flights from Dollar Flight Club with public transit. Instead of spending $100 on a cab, a $10 train ride can leave you with extra cash to enjoy your trip.
10. Have a Backup Plan
Having a backup plan can make all the difference when unexpected travel hiccups arise. Public transit delays are common, especially in major U.S. cities like New York, Chicago, and Los Angeles. During rush hour, delays of 5–15 minutes are typical, and occasional line closures due to construction or storms can throw a wrench in your plans a few times a year. Even minor setbacks can disrupt carefully timed schedules.
Before your trip, use tools like Google Maps or Citymapper to save an alternative route. Make sure this backup option uses a different transit mode or line – if you’re relying on the subway, consider a bus or commuter rail as a fallback. Screenshot the route details so you can access them even if cell service drops. Jot down key information like line names, numbers, and transfer points to make switching routes as smooth as possible. Keep an eye on live updates from your transit app to stay informed.
If delays stretch beyond 20–30 minutes, it’s time to consider a rideshare. In most U.S. cities, a rideshare from downtown to the airport typically costs between $25 and $40 – a small price compared to missing your flight. To stay prepared, save your transit agency’s customer service number, a taxi contact, and your hotel address both digitally and on paper.
Adding a buffer of 15–30 minutes for normal trips and 60–90 minutes for crucial connections can save you a lot of stress, especially during peak hours or bad weather. This extra time gives you flexibility to catch the next bus, walk to a different stop, or switch to a rideshare without feeling rushed.
Late-night or early-morning travel requires even more planning since transit schedules are often limited during these hours. Check the agency’s night and weekend schedules in advance, and if service is sparse, pre-arrange a rideshare or taxi with an estimated fare. Treating your backup plan as part of your overall strategy – not a last-minute fix – helps you stay calm and confident when things don’t go as expected.
Lastly, if flight delays threaten your departure, tools like Dollar Flight Club can help you find discounted alternatives quickly. With a little preparation and flexibility, you can handle travel surprises without breaking a sweat.

Conclusion
Traveling through cities doesn’t have to be overwhelming or expensive. With a bit of preparation, you can navigate like a pro. Start by researching your transit options, downloading helpful apps like Google Maps or CityMapper, and picking up the right fare card. These simple steps can save you both time and money while reducing stress in unfamiliar places.
To make the most of public transit, keep a few things in mind: secure your belongings, follow local etiquette (like ringing the bell before your stop), and have a backup plan for delays. Mixing buses and trains with walking or biking can give you more flexibility, while checking schedules helps you steer clear of the busy 5–7 PM rush.
The savings? They can add up quickly. Public transit is often far cheaper than rideshare services, and multi-ride passes can cut your daily costs by $20 or more. Traveling midweek – on Tuesdays or Wednesdays – and taking advantage of discounts for students, seniors, or military members can stretch your budget even further.
You can also pair these transit tips with flight deals from Dollar Flight Club. Members get alerts for flights up to 90% off, making it easier to score affordable tickets and connect seamlessly with local transit once you arrive.
FAQs
What are the best ways to stay safe while using public transportation?
To ensure your safety while using public transit, it’s important to stay alert and mindful of your surroundings. Keep your belongings close and secure to avoid theft. Whenever possible, avoid waiting at isolated or dimly lit stops, particularly after dark, and try to travel with a companion. Stick to well-populated areas, as they tend to be safer. If you notice anything unusual or concerning, don’t hesitate to inform transit staff or contact local authorities. A little vigilance can make all the difference in having a safe and worry-free trip.
Why choose public transit over rideshares or taxis while traveling?
Public transit is typically an easier-on-the-wallet way to travel, offering a cost-effective alternative to pricier options like rideshares or taxis. Beyond saving money, it’s also a more environmentally friendly choice, as it reduces individual car usage and helps lower overall vehicle emissions by pooling rides. Most public transportation systems are built with safety in mind, featuring well-lit stations and reliable schedules to ensure a secure travel experience. For those looking to save money and make eco-conscious decisions, public transit stands out as a practical option.
How can I pick the right transit pass for my trip?
When picking a transit pass, consider how often you’ll be traveling, your destinations, and the duration of your trip. Passes that include unlimited rides or offer discounts for multiple trips can be a great deal if you plan to use public transportation regularly. Double-check that the pass covers all the systems you’ll need, like buses, subways, or trains.
It’s also smart to compare the pass price to the cost of individual tickets. If you’re staying in one area for several days, a daily or weekly pass could save you money. On the other hand, if your travel is limited to just a few rides, pay-as-you-go might be more practical. With a bit of planning, you can choose the option that’s both convenient and budget-friendly!